Dresden Fan
This is a quick overview with additional pictures for the Dresden Fan pattern. For full-size templates, fabric requirements, and complete pattern instructions you must print out the PDF file version of Dresden fan.
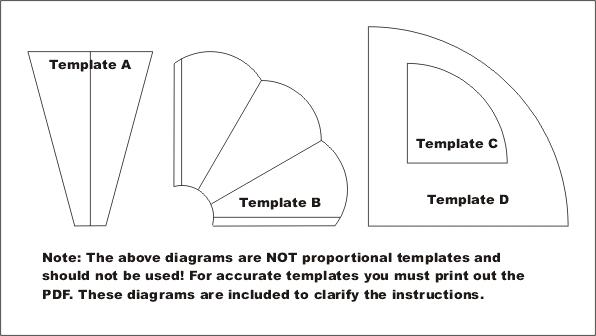
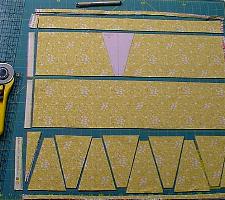
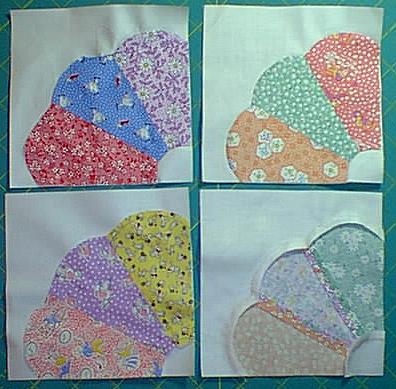
Step 1 - Each block requires three patches, and a 6.5 inch square of background fabric. Using template A, the patches are cut from 5.25 inch strips of fabric. The background squares are 6.5 inches and can be from one or more fabrics. There should be some contrast between patches and the background fabrics. Directional fabrics will require additional yardage.
 Step
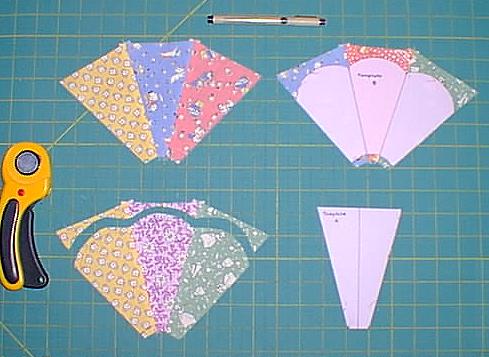
2 - Sew sets of three patches together, forming triplets. Press the seams
open. Mark the triplets using template B with the applique lines. I use
a very fine permanent ink pen to mark my applique lines. After you have
the applique lines in place, trim within a scant quarter of an inch to
the applique lines.
Step
2 - Sew sets of three patches together, forming triplets. Press the seams
open. Mark the triplets using template B with the applique lines. I use
a very fine permanent ink pen to mark my applique lines. After you have
the applique lines in place, trim within a scant quarter of an inch to
the applique lines.
 Step
3 - Placing the triplets on top of the background squares with right sides
facing up, carefully align the straight edges, and pin or baste into place.
Using the hand applique method of needle turning, use the needle to turn
the fabric over the marked edge of the curve and stitch along the marked
curves. If the quilt is to be machine quilted over the edges for durability,
use the minimum number of stitches to create a smooth curve. Afterwards,
if you choose you can clip the background fabric from behind the fan area,
reducing bulk. I recommend removing the background fabric, especially
if you intend to hand quilt.
Step
3 - Placing the triplets on top of the background squares with right sides
facing up, carefully align the straight edges, and pin or baste into place.
Using the hand applique method of needle turning, use the needle to turn
the fabric over the marked edge of the curve and stitch along the marked
curves. If the quilt is to be machine quilted over the edges for durability,
use the minimum number of stitches to create a smooth curve. Afterwards,
if you choose you can clip the background fabric from behind the fan area,
reducing bulk. I recommend removing the background fabric, especially
if you intend to hand quilt.
 Step
4- The blocks are then ready to assemble into a quilt top. Lay out the
blocks, and stack carefully. Sew first into rows, and then sew rows together
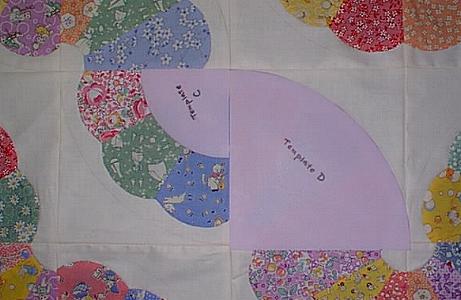
to form the quilt top. After assembling the quilt top, use two simple
templates, templates C and D, to mark each block with lines to be quilted
using a proper marking tool. These two sets of lines along with the edges
of the fans will form the guidelines used during machine quilting. Layer
the quilt, using the backing and batting. Pin or thread baste the layers
into place.
Step
4- The blocks are then ready to assemble into a quilt top. Lay out the
blocks, and stack carefully. Sew first into rows, and then sew rows together
to form the quilt top. After assembling the quilt top, use two simple
templates, templates C and D, to mark each block with lines to be quilted
using a proper marking tool. These two sets of lines along with the edges
of the fans will form the guidelines used during machine quilting. Layer
the quilt, using the backing and batting. Pin or thread baste the layers
into place.
 Step
5 - Starting in the center and working outwards, machine quilt along the
marked lines. Keep echo stitching along those lines until you have quilted
it enough to make it visually pleasing, and to satisfy the batting’s
minimum quilting requirements. If you prefer you can machine quilt over
the edges of the applique to reinforce it.
Step
5 - Starting in the center and working outwards, machine quilt along the
marked lines. Keep echo stitching along those lines until you have quilted
it enough to make it visually pleasing, and to satisfy the batting’s
minimum quilting requirements. If you prefer you can machine quilt over
the edges of the applique to reinforce it.
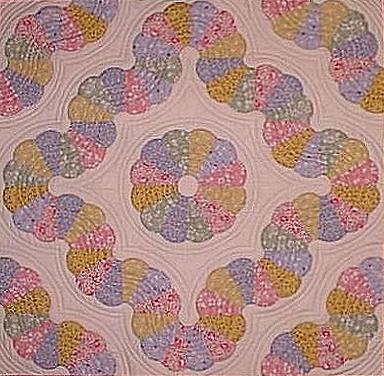
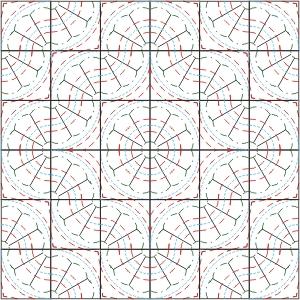
This image is the quilt top with the suggested
quilting lines to give an idea of the overall effect. The blue lines are
the marked quilting lines done in Step 4. The red lines are echo quilting
lines. The dotted black lines are the quilting over the edges of applique.
Do not quilt in between the patches. This machine quilting can be done
easily with a walking foot. A variegated thread can really add an extra
sparkle to the quilting.
Finish with a simple binding, and you have
a durable yet fanciful quilt to be used and laundered with little fuss.
Perfect as gifts to children, and adults alike.
©Copyright
2002, Marjorie Jo Mancuso
Unauthorized Use is Prohibited
March 2, 2002